How to manage notes with channels?

Steven
Last Update 3 years ago
Overview
The Instaminutes “Channels” feature is a great way to streamline and categorize your various meetings into different channels so you can sieve and filter out the information of your choice, from those meetings, whenever you want to.
Your Instaminutes account already comes equipped with a few channels of its own, but you can always add more channels to further categorize your every single meeting.
Here’s how to do so.
📌 Viewing your current list of channels and the meetings under them
Your Instaminutes account comes with a default list of channels, which can also be expanded later. Here’s how to check your current list of channel and view the ones that you might have added :
1. 1. On the left panel of your Instaminutes overview dashboard, find the option named “Channels” and click on it.
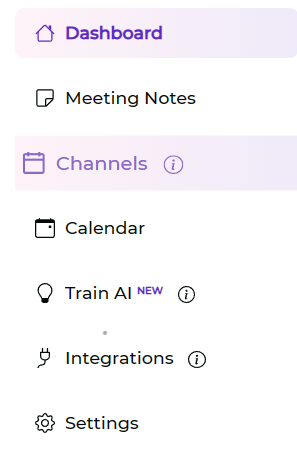
2. You’ll see a list of the current channels that you have or made.
3. Click on the desired channel to reveal the meetings that you have in it.
Make sure to switch to the “Notes” tab in the next screen to see the entire list of meetings at one place.
📌 Adding a new channel via your dashboard
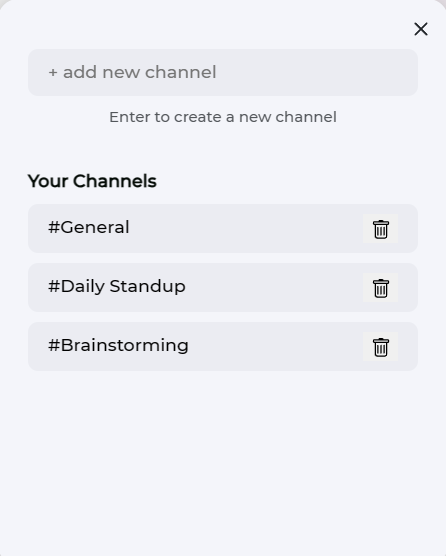
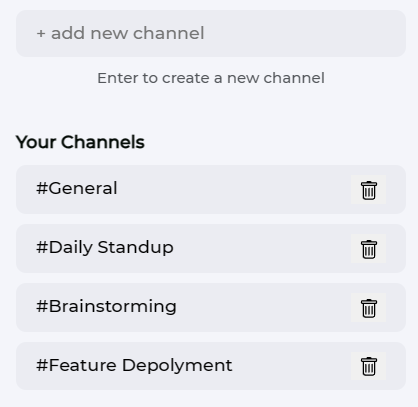
1. Click on the “Channels” button present on the left pane of your Instaminutes dashboard, this will open the present list of channels you have :

2. Click on the “+add new channel” button to make the cursor appear and simply write the name of the new channel that you want to create and press enter.
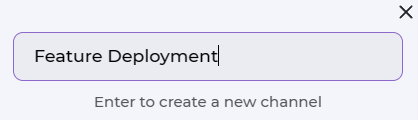
3. Your new channel will appear at the bottom of the list
📌 Adding a new channel via your meeting dashboard
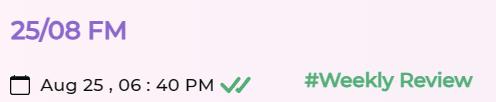
1. Go to the meeting card that you want to categorize into a new channel and click on the (+) button on the title bar present next to the date and time of your meeting.

2. As soon as you press the (+) icon, it will change into a field where you can right your desired channel name.

3. Press enter after writing and your new channel will readily be created with the present meeting already assigned to it.
📌 Adding your notes to an existing channel
1. Go to your desired meeting and click on the (+) button on the title bar present next to the date and time of your meeting

2. As soon as you press the (+) icon, it will change into a field where you can write the name of the existing channel that you want the meeting to be added to.
3. Start typing the name of the channel and you’ll see it instantly appear in the suggestions below
4. Click on the desired suggestion, this will instantly add the meeting to the selected channel
📌 Deleting an already existing channel
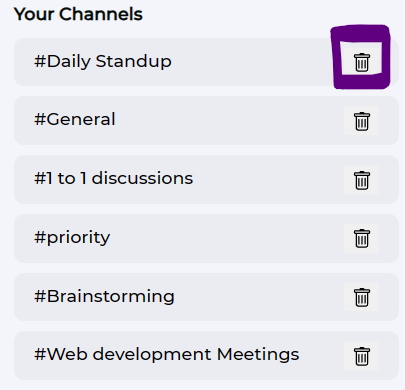
1. On the left panel of your Instaminutes overview dashboard, find the option named “Channels” and click on it.
2. You’ll see a list of the current channels that you have or made.
3. You can press the Delete “🗑️” icon to instantly delete a channel without deleting the meetings under it.
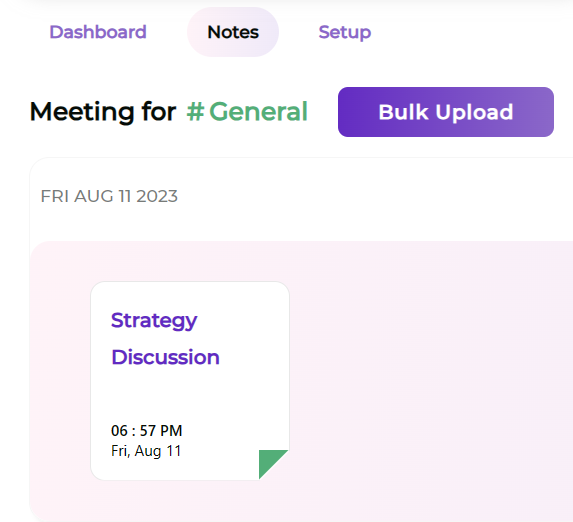
📌Uploading multiple meetings to your channel
If you have a pre-recorded set of meetings (audio and video files) that you want to upload all at once and instantly add to one channel for instant categorization, you can ‘bulk upload’ them to a channel.
1. Create a new channel (See : Adding a new channel via your dashboard ) or click on the desired channel from the list of channels ( See : Viewing your current list of channels and the meetings under them)
2. On the next screen, click on the “notes” tab to see all the notes under that tab

3. Click on the ‘Bulk Upload’ button
4. You’ll see a menu pop up, which will help you with uploading the meetings
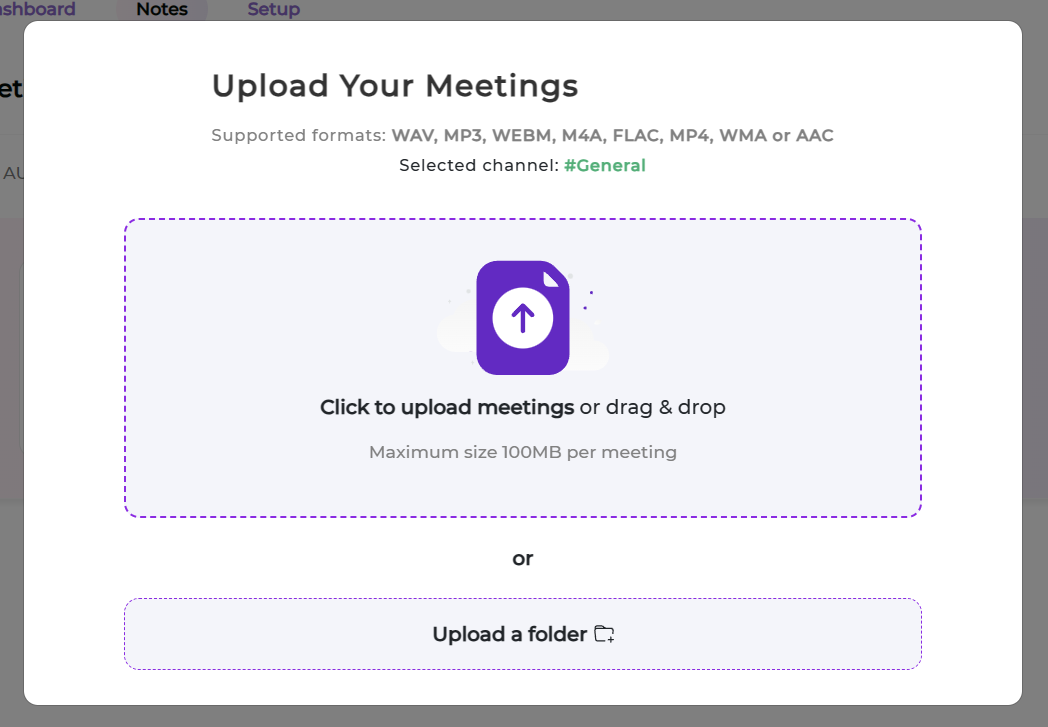
5. You can either upload the select few meetings that you want by clicking on the “Click to upload meetings” prompt or you can even drag and drop singular meetings into the given area.
6. Or you can upload an entire folder containing just your selected recording from the “Upload a folder” button.
📌Setting up your channel analytics dashboard
1. Go to your desired channel after clicking on the ‘Channel’ button on the dashboard. (see: Viewing your current list of channels and the meetings under them)
2. Click on the ‘Setup’ tab and click on the “Add topics now”
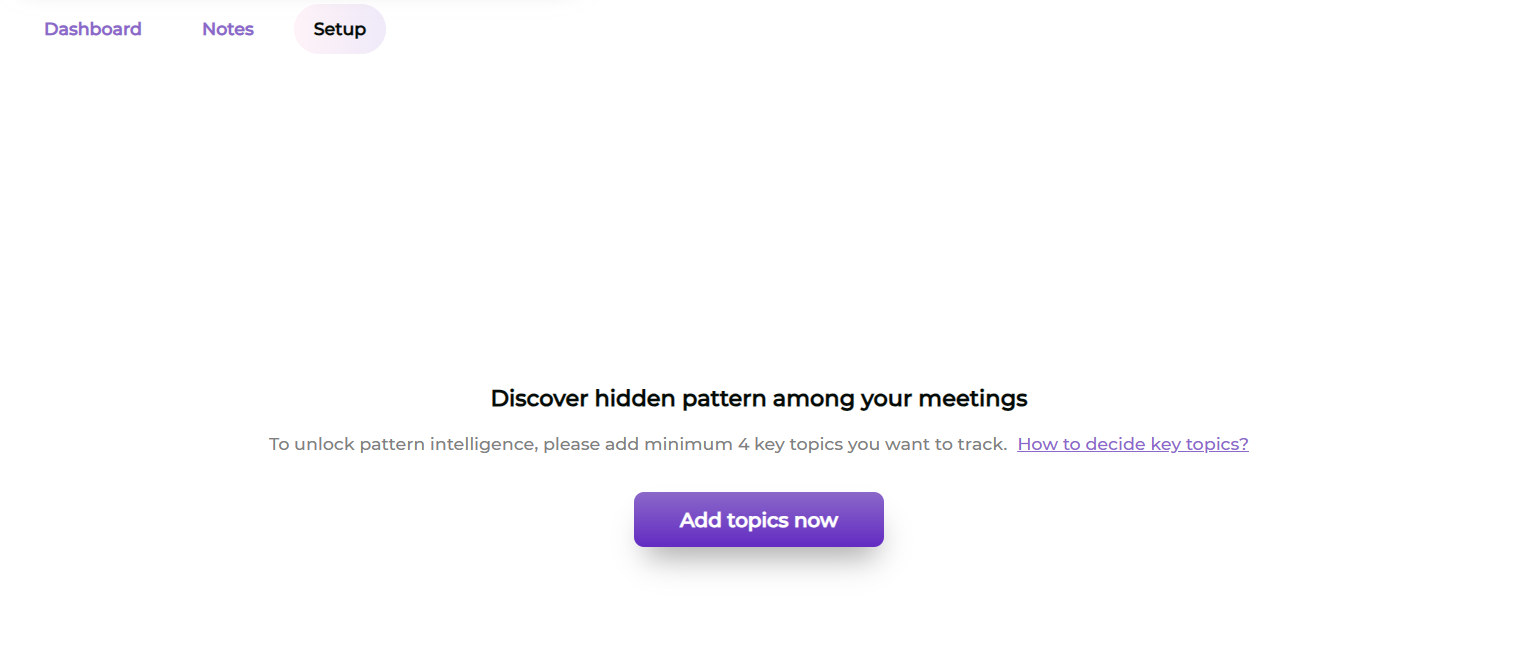
3. Think of some topics (words and phrases) that are related to the description of your channel and the meetings that you want to have categorized under them. Type the keywords over the given blank space and press the “add” button when you’re done.
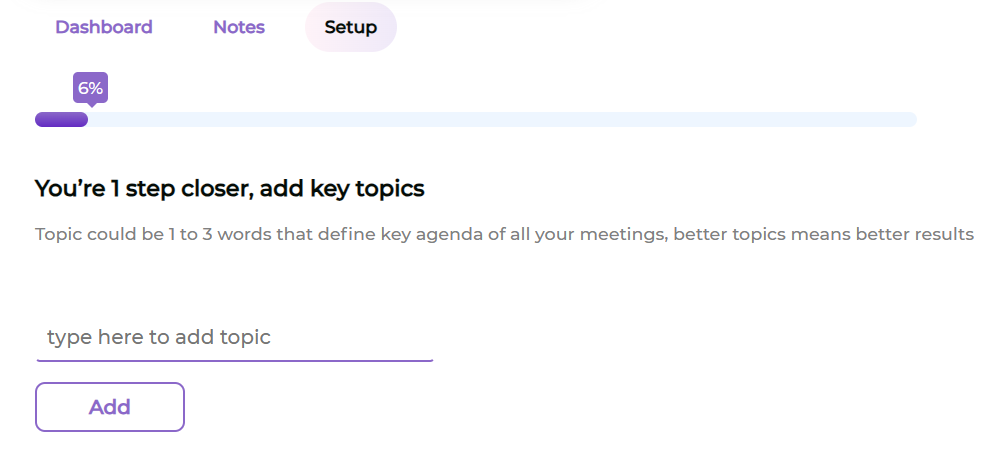
4. It is important to add at least 4 topics for setting up your dashboard analytics. After you add 4 topics, you’ll be able to see and click the ‘Next’ button under the row of the topics that you have already added.
5. After completing the previous step, you’ll be taken to the next setup process.
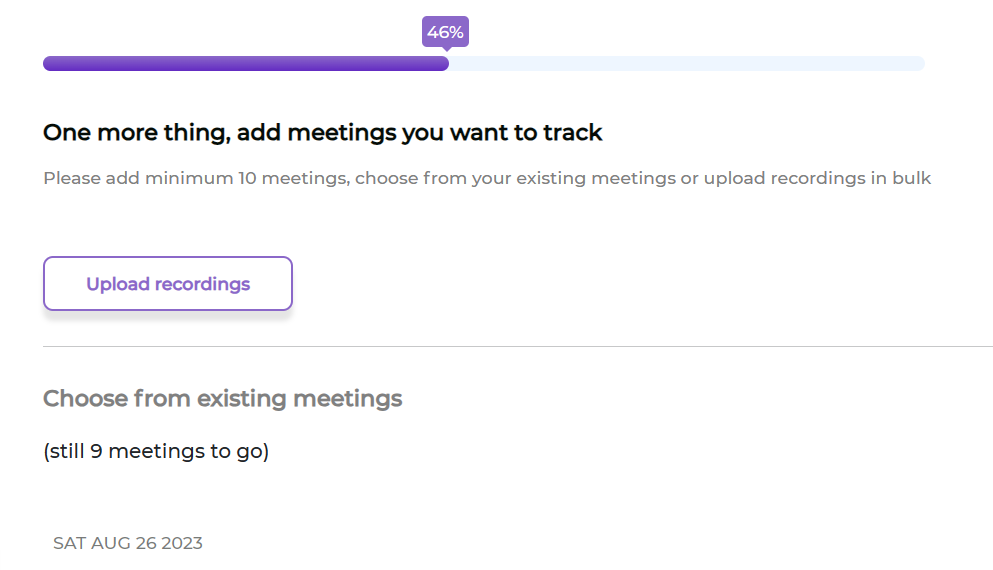
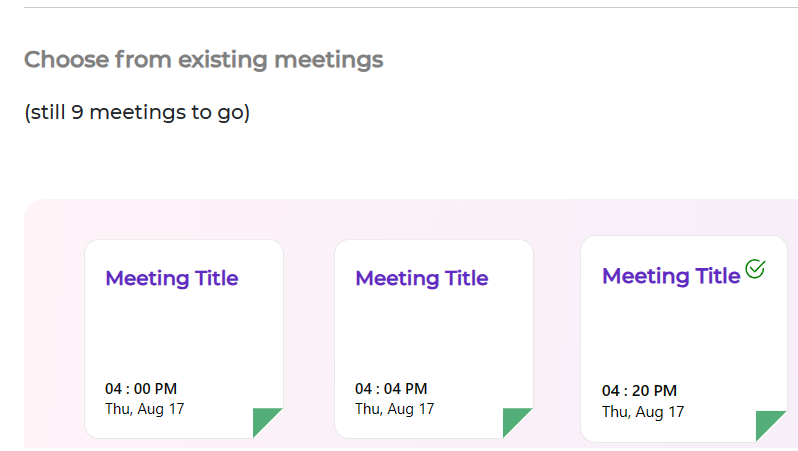
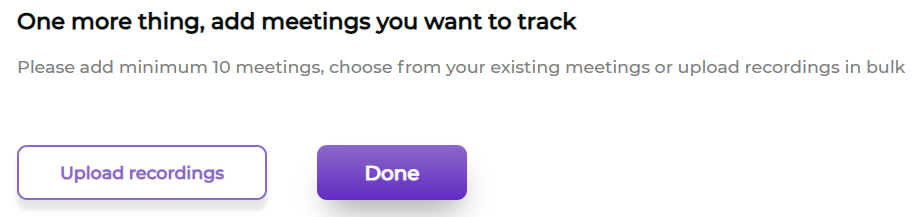
6. Select at least 10 or more existing meetings by selecting the meeting cards at the bottom of the screen or you can upload your recordings.
7. Keep selecting the meetings until the progress bar reaches 100%.
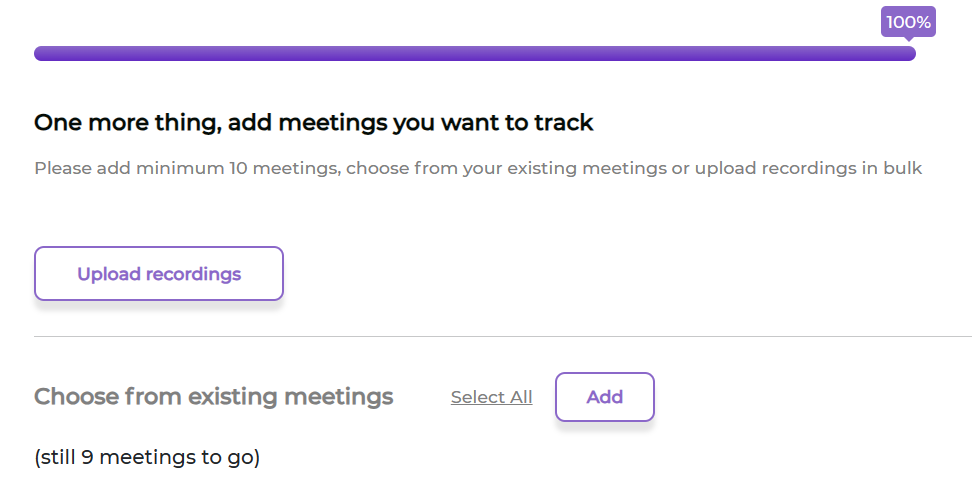
8. Press the ‘Add’ button once you have selected enough meetings

9. Click the ‘Done’ button (right next to the “Upload Recordings” box)
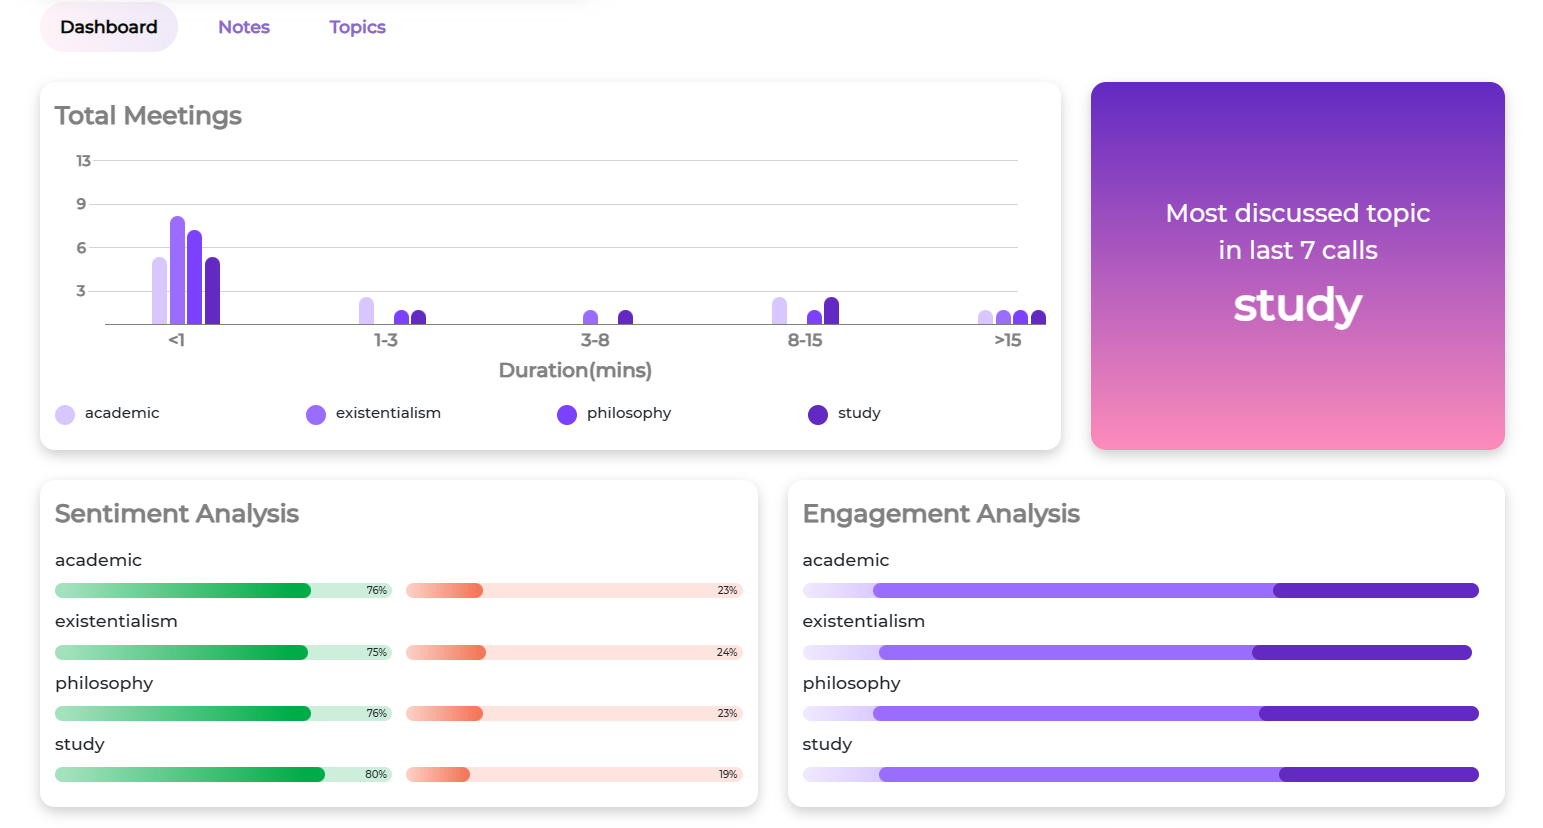
10. You’ll be taken to the “Dashboard” tab and within a few moments, your analysis and insights will be readily available for you
🏷️Conclusion
This guide covers the way in which you can view and add your channels to Instaminutes, which will help you to categorise your meetings and keep your notes well organised. You can view your channels on the dashboard via the method stated above and add new channels via the two methods given in the guide. Be sure to use dashboard analytics to increase your insights from your meetings.