Troubleshooting the Instaminutes Notetaker

Steven
Last Update hace 3 años
If you are facing issues with the Notetaker then firstly we recommend you to use our Instaminutes Chrome extension (available for any Chromium-based browser like Edge, Brave, or Google Chrome itself) or our Instaminutes desktop application for Windows.
In all other cases, we suggest you integrate your calendar and use the Instaminutes AI notetaker that will automatically join your meeting, record and summarize it.
This guide covers various methods to fix issues that you might encounter while using the Instaminutes Notetaker.
You can also directly jump to the issue as shown under your notes card:
- Notetaker was waiting, but no one let it in
- Notetaker tried to join the meeting, but the passcode was missing
- Notetaker was denied entry
- Notetaker was removed
1. Notetaker was waiting, but no one let it in
If you see this issue on your notes card then there are two possible scenarios that can lead to this issue, let’s see in detail what they are and how to resolve them:
A. The meeting was not started or the host was not there.
The AI Notetaker went to join your meeting at the time mentioned in your calendar, but no one (mostly the host) started the meeting. In simple words, the AI notetaker kept waiting on the bridge and requested someone (the host) to let it in but there was no one who could let it inside the meeting. In this case, the notetaker waits for 5 minutes for someone to join the meeting and accept its request. If no one joins the meeting within 5 minutes then the AI notetaker assumes that this meeting is not going to happen and it leaves.
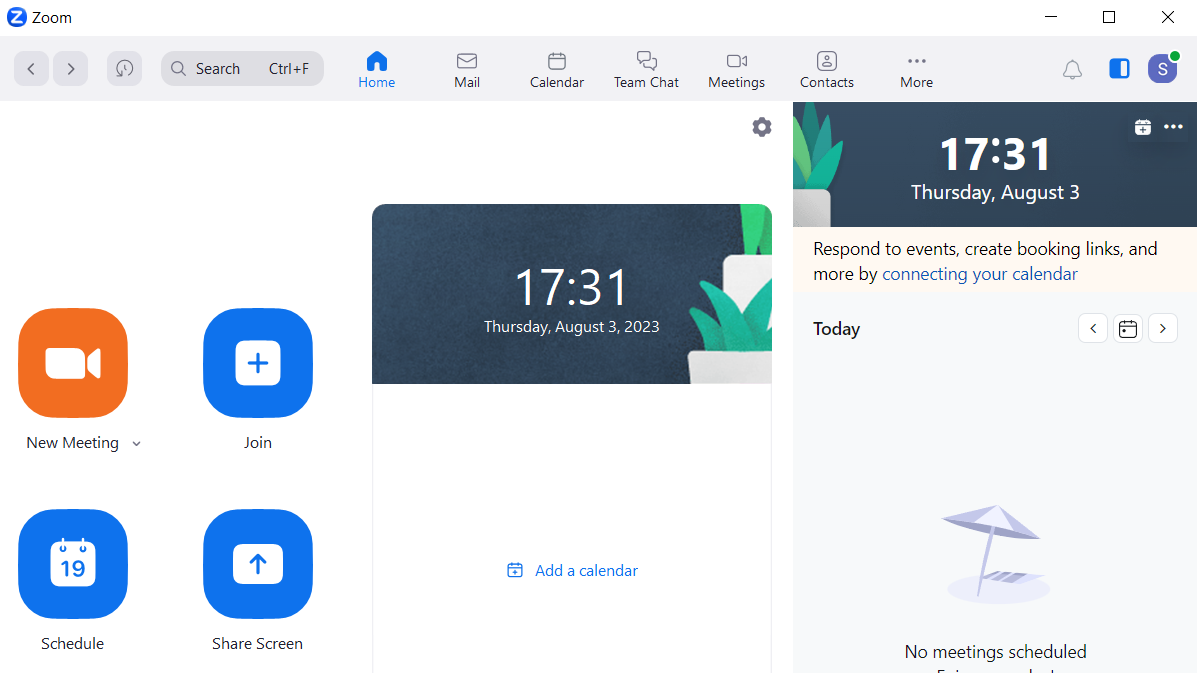
If in case the meeting does commence after 5 minutes of the set time and you find that the Notetaker has already left, you can use the “Invite Notaker” option under the “New” button on the top right corner of the Instaminutes web portal.
Alternatively, you can use our Chrome Extension (Available for any Chromium-based browser like Edge, Brave, or Google Chrome itself) or our Desktop Application for Windows to start recording anytime you want. So, do keep it installed for emergency use.
Now another way to resolve this issue is to sync your meeting tool settings and let the AI notetaker join the meeting before the host.
To do this please turn on (or ask your host to turn on) the option within your meeting tool that allows participants to join the meeting before the host themselves.
Try the following workaround based on the meeting tool you are using to attend the meeting.
This option in Zoom can only be enabled via the web portal. Here are the steps to turn on the feature:-
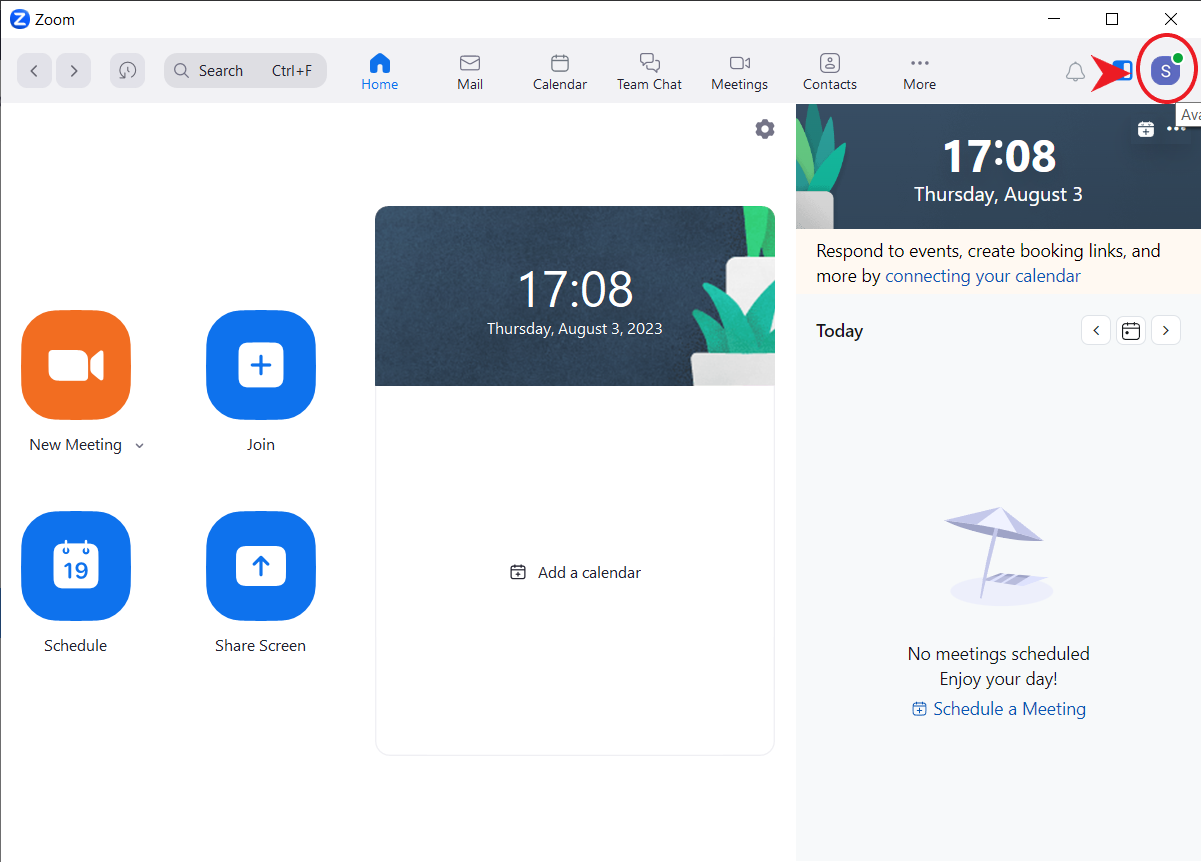
i. Open the Zoom desktop app

ii. Click on your profile’s icon in the upper right corner

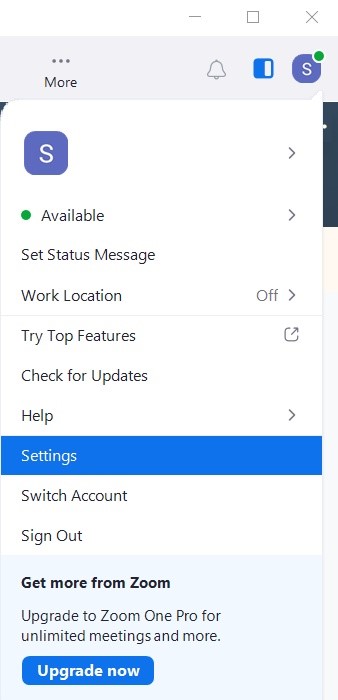
iii. Click on the “Settings” option

iv. Choose the “General” tab and scroll further down in the new window
v. Select the “View More Settings” prompt at the very bottom of the general settings window
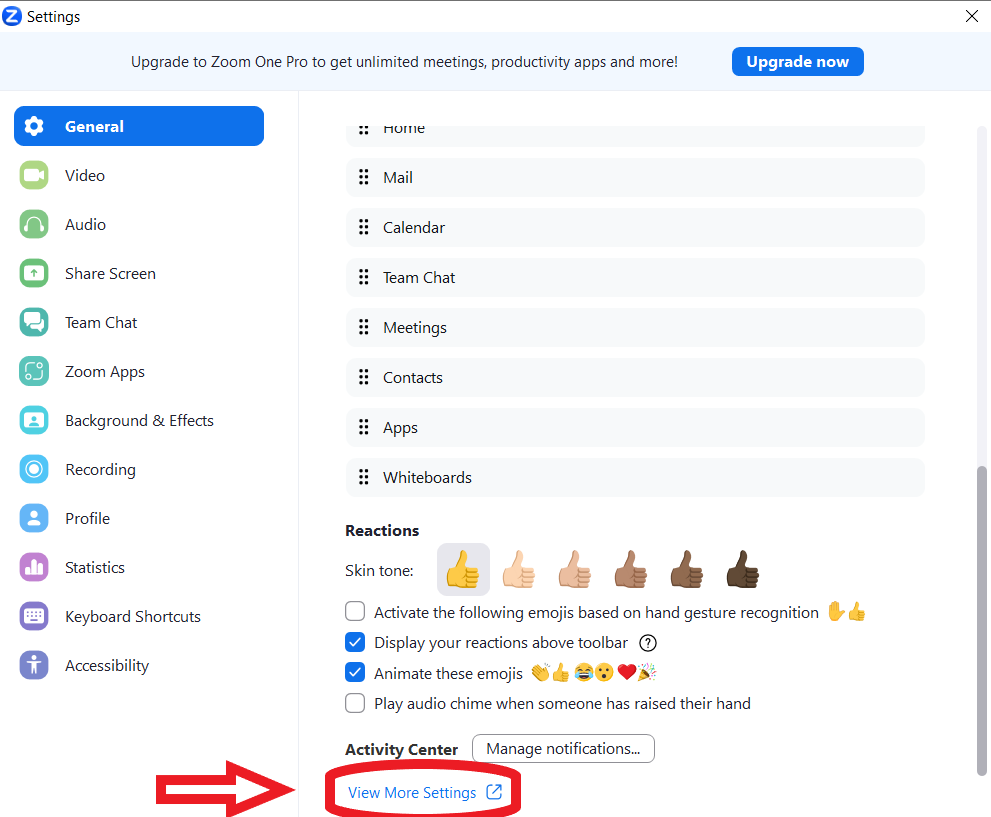
vi. You’ll be landed on the Zoom web portal where you can edit your advanced account and meeting settings.
vii. The first page you’ll see is the “Settings” section under the “Personal” Tab

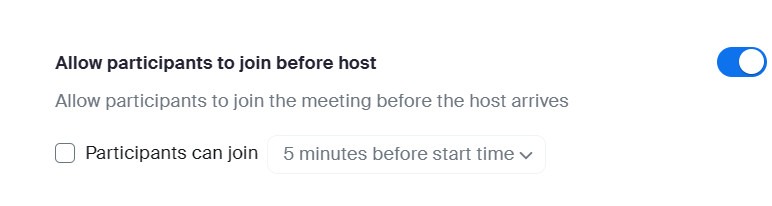
viii. Select the “Meetings” sub-category on the “Settings” page and scroll further down till you see the “Allow participants to join before host” option.
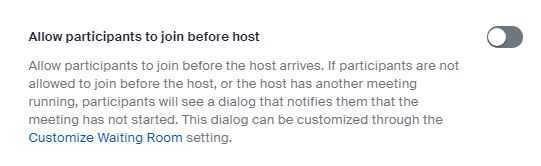
ix. Enable the option with the toggle switch on the right.
2. Allow attendees to bypass the lobby in Microsoft Teams
With Microsoft teams, there are two ways to do it depending on how you use the Microsoft Teams app.
1. On conducting a meeting via the “Meet Now” option.
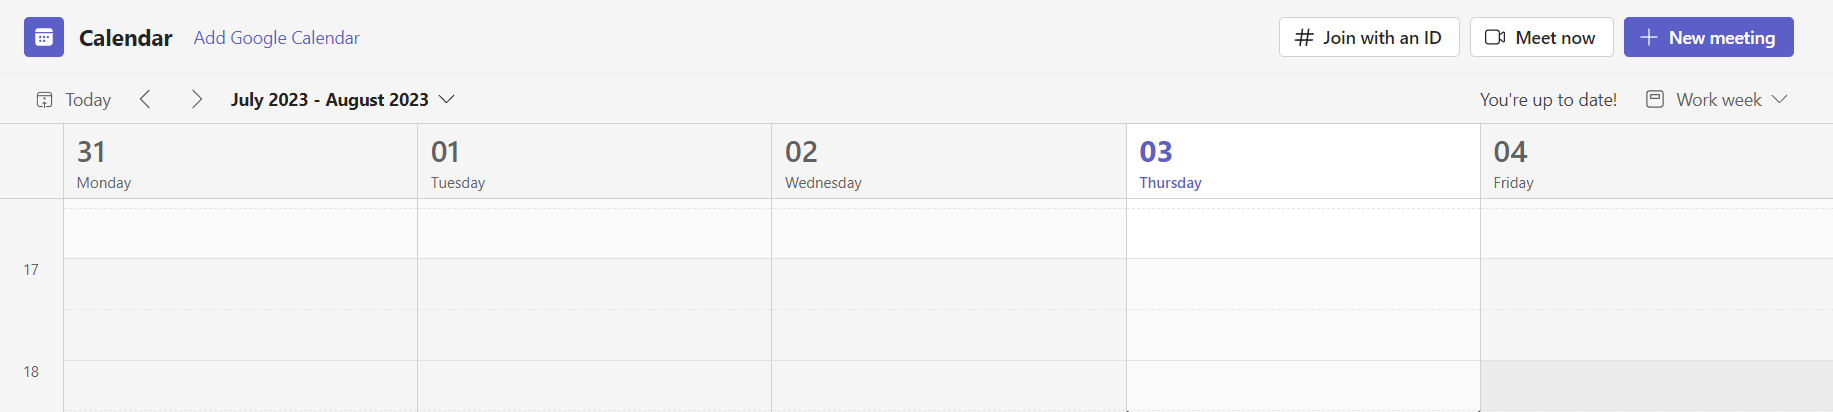
i. Open the Microsoft Teams desktop app and go to the Calendar section on the vertical tab ( present on the left pane of your window)
ii. Click on the Meet Now button to instantly start the meeting.

iii. Once you have selected your preferred devices and background, and are in the meeting. Click on the option titled “More” in the upper panel of your meeting screen.
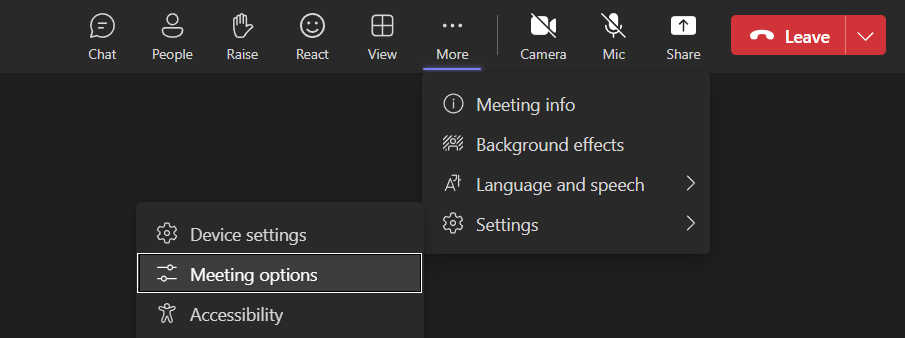
iv. Click further on the “settings” tab and choose “Meeting Options”.
v. The “Meeting Options” settings will open on the right side of the screen, displaying your default settings.
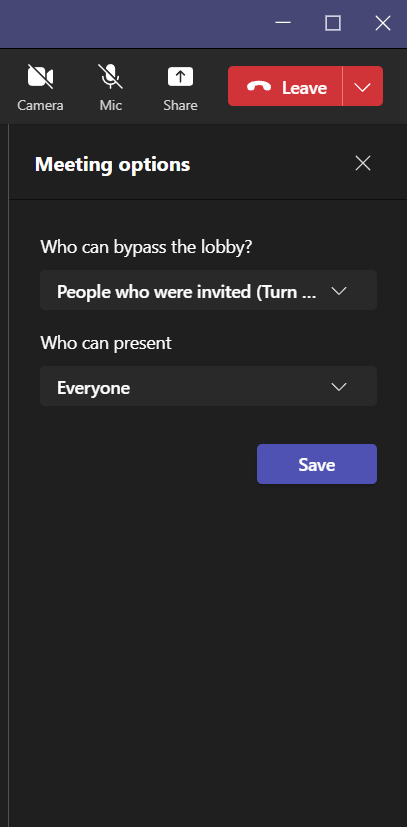
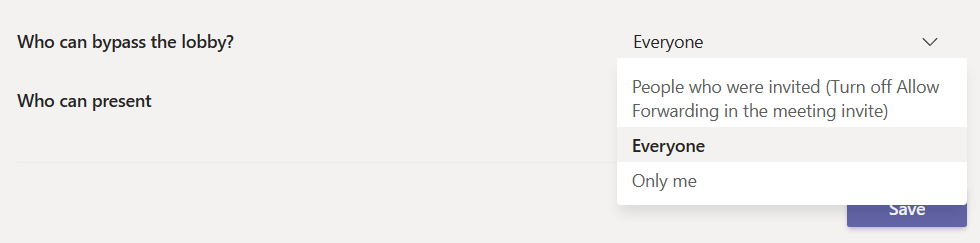
vi. Under the “Who can bypass the lobby” option, click on the drop-down menu and select “Everyone”.

vii. Click on the “Save” button to accept these changes.
2. On scheduling and conducting a meeting via the calendar.
i. Open the Microsoft Teams desktop app and go to the Calendar section on the vertical tab ( present on the left pane of your window)
ii. Click on a desirable meeting time slot to schedule a new meeting.
iii. Remember to add attendees to you meeting
iv. Click on the “Send” option on the upper right corner of the screen and close the small pop-up window that appears next.
v. You’ll be taken back to your calendar, but now you’ll see your selected slot filled with your scheduled meeting.
vi. Double-click on the meeting that you have just scheduled.
vii. On the upper panel (above the blanks) you’ll see several options in the “Details” tab.

viii. Click on “Meeting options” and you’ll be taken to your browser to edit this setting
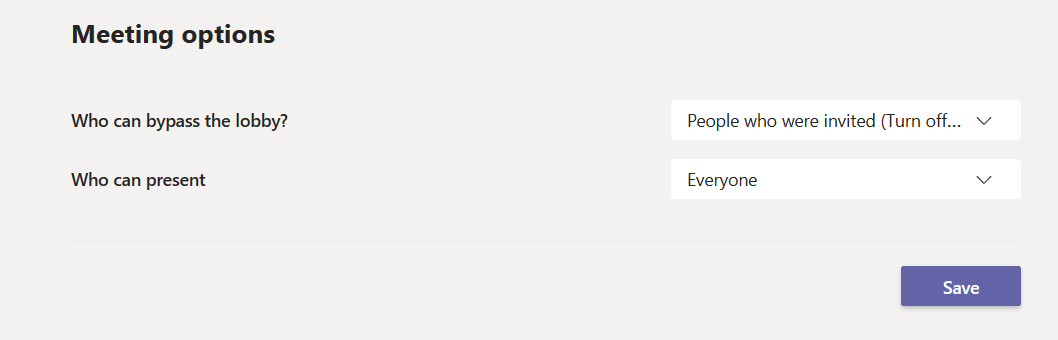
ix. Select and click on “Everyone” in the drop-down menu next to the “Who can bypass the lobby” option.
x. Click on the “Save” button to approve these changes.
B. Notetaker waited for 5 minutes but no one accepted
Now in this case, the meeting was started and the participants (including host) were there but no one accepted the AI notetaker’s request to join the meeting, intentionally.
If you are the host of the meeting, please accept the AI notetaker's request. If not, then ask the host to accept its request since you want to record and summarize this meeting.
It’s essential to admit the Notetaker into your meetings so it can carry out its said functions. Please ensure that the host approves your Notetaker’s request to attend the meeting within 5 minutes of its commencement.
Also, if as a host - you don’t want to repeat this process manually - then you can automate it by changing the settings in your preferred meeting tool. This is accomplished by ensuring that the meeting does not require some form of authentication or manual approval to admit the attendees and participants. You can accomplish this using Zoom via the method given below.
1. Disabling repetitive user authentication in Zoom
i. Open the Zoom desktop app

ii. Click on your profile’s icon in the upper right corner
iii. Click on the “Settings” option
iv. Choose the “General” tab and scroll further down in the new window
v. Select the “View More Settings” prompt at the very bottom of the general settings window.

vi. You’ll be landed on the Zoom web portal where you can edit your advanced account and meeting settings.
vii. The first page you’ll see is the “Settings” section under the “Personal” Tab
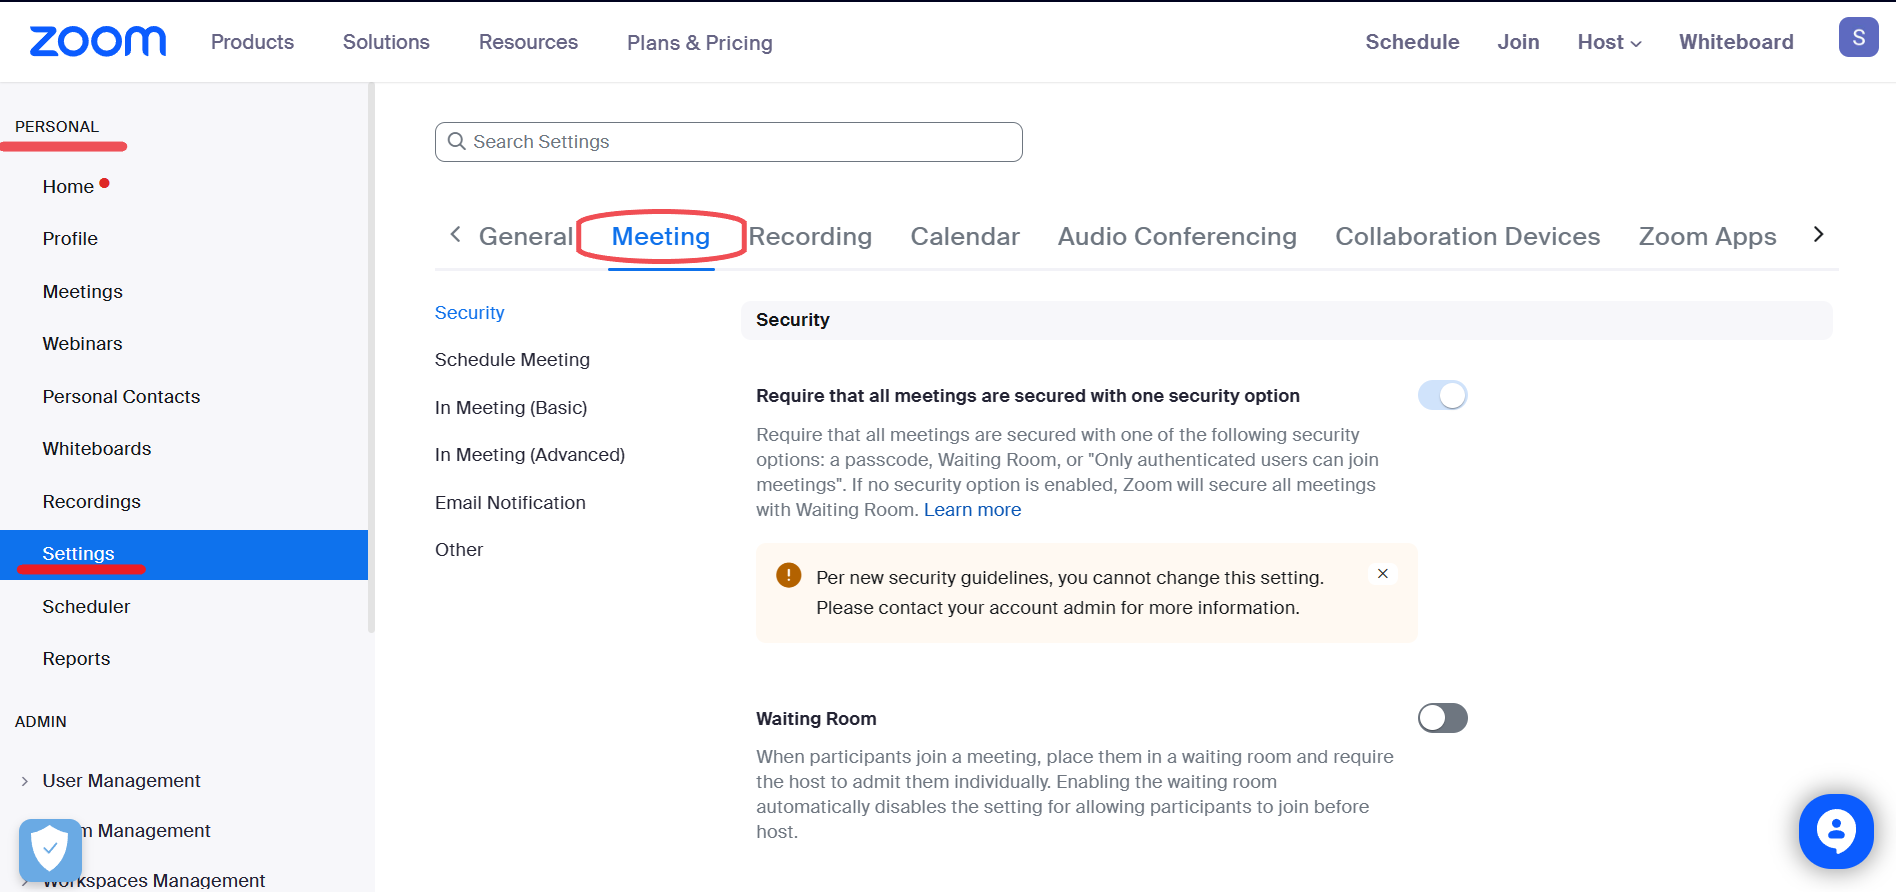
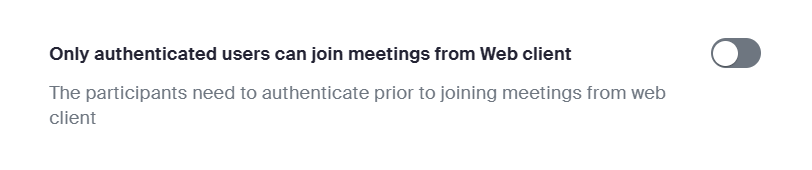
viii. Disable the “Only authenticated users can join meetings from Web client” option.
To summarize this issue, If no one is present to host, conduct or attend a meeting - it can impact your Notetaker’s ability to take notes in the following ways:
● There will be no one to approve the Note-Taker’s entry into the meeting (if an external authentication is required)
● The Note-Taker will have no data (or a meeting, in this case) to make notes out of
● If the Note-Taker is alone for more than 5 minutes with no data to analyze and deliver, it has to quit the meeting.
We request you to optimize your meeting app with the settings given above
1. Allow participants to join before the host in Zoom
2. Allow everyone to bypass the lobby in Microsoft Teams
3. Disabling repetitive user authentication in Zoom
2. Note-Taker tried to join the meeting, but the passcode was missing
Some meetings on Zoom and Microsoft Teams might require a passcode to join. If this passcode is not present in your calendar event then the AI notetaker can’t join the meeting or even raise the request to join it.
To avoid this scenario, in Zoom, specifically, you can ease this by embedding the passcode into the meeting link automatically.
Here’s how you do it:-
A. Embedding meeting passcode in the link for Zoom.
This option in Zoom can only be enabled via the web portal. Here are the steps to turn on the feature:-
i. Open the Zoom desktop app
ii. Click on your profile’s icon in the upper right corner

iii. Click on the “Settings” option

iv. Choose the “General” tab and scroll further down in the new window
v. Select the “View More Settings” prompt at the very bottom of the general settings window.

vi. You’ll be landed on the Zoom web portal where you can edit your advanced account and meeting settings.
vii. The first page you’ll see is the “Settings” section under the “Personal” Tab

viii. Select the “Meetings” sub-category on the “Settings” page and scroll further down till you see.
ix. Under ‘Security, enable the “Embed passcode in invite link for one-click join” option “Embed passcode in invite link for one-click join”
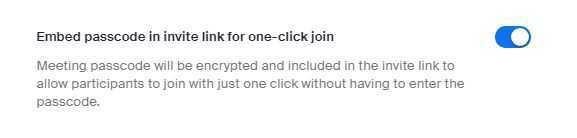
x. Make sure to enable the said option to help the Note-Taker join meetings that require a passcode.
3. Notetaker was denied entry
This issue mostly occurs when the AI notetaker tries to join a meeting where some type of authentication was required and you were not the host. This can also occur if the AI notetaker’s request to join the meeting was denied by the host.
The easiest way to resolve this is by informing the host right at the start of the meeting that you want to record and summarize this call for later use with your AI notetaker assistant.
The denial of entry into a meeting can severely impact the Notetaker’s ability to carry out its basic functions for you.
If, in case, the host doesn’t agree to your request, then be sure to use our Chrome Extension (Available for any Chromium-based browser like Edge, Brave, or Google Chrome itself) or our Desktop Application for Windows.
Moreover, you can also record the meeting using the meeting tool itself or ask the host to record it and upload that recording (using the “Upload” button on the Instaminutes web portal).
4. Notetaker was removed
If, for some reason, the Notetaker assistant is removed prematurely during a meeting by anyone (mostly the host) then the ability of the Notetaker to carry out its functions might be impacted, ending up in providing you a recording, transcript, and summary limited to the time it was present in the meeting.
Sometimes, it also may happen that your meeting was not processed successfully due to the Note Taker being forcefully removed from the meeting. This could lead to the loss of the entire meeting record.
To avoid this, we mostly request users to inform everyone in the meeting about the presence and purpose of the AI notetaker assistant and how it won’t impact their meeting in any way, as it is just there to record and take notes. Furthermore, it’s fully secured using AES256 bit encryption, and SSL security and complies with GDPR and HIPPA compliances.
In case, if the AI Note Taker is removed by mistake - then you can use the “Invite Notaker” option under the “New” button on the top right corner of the Instaminutes web portal - and invite the AI Notetaker assistant again, instantly.
Alternatively, you can use our Chrome Extension (Available for any Chromium-based browser like Edge, Brave, or Google Chrome itself) or our Desktop Application for Windows.
Moreover, you can also record the meeting using the meeting tool itself and upload that recording using the “Upload” button on the Instaminutes web portal to transcribe and summarize it.